
TL;DR
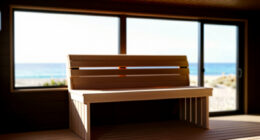
Using a closet as a vocal booth is a smart, cost-effective move. Proper placement of the mic and treatment reduces reflections, while ventilation keeps things cool. It’s about controlled absorption—not total silence—and smart door sealing.
Think your closet is just a mess of clothes and random gear? Think again. It could be your secret weapon for clean, professional-sounding vocals or voice recordings. All it takes is a little understanding of acoustic dampening, smart placement, and ventilation.
Most people assume they need a fancy soundproof room to get good audio. But often, the real magic happens in the details—where you put your mic, how you treat the walls, and how you handle airflow. You can learn more about acoustic dampening and placement to optimize your closet setup. This isn’t about turning your closet into Fort Knox; it’s about making it work for your voice without turning it into a boxy echo chamber.
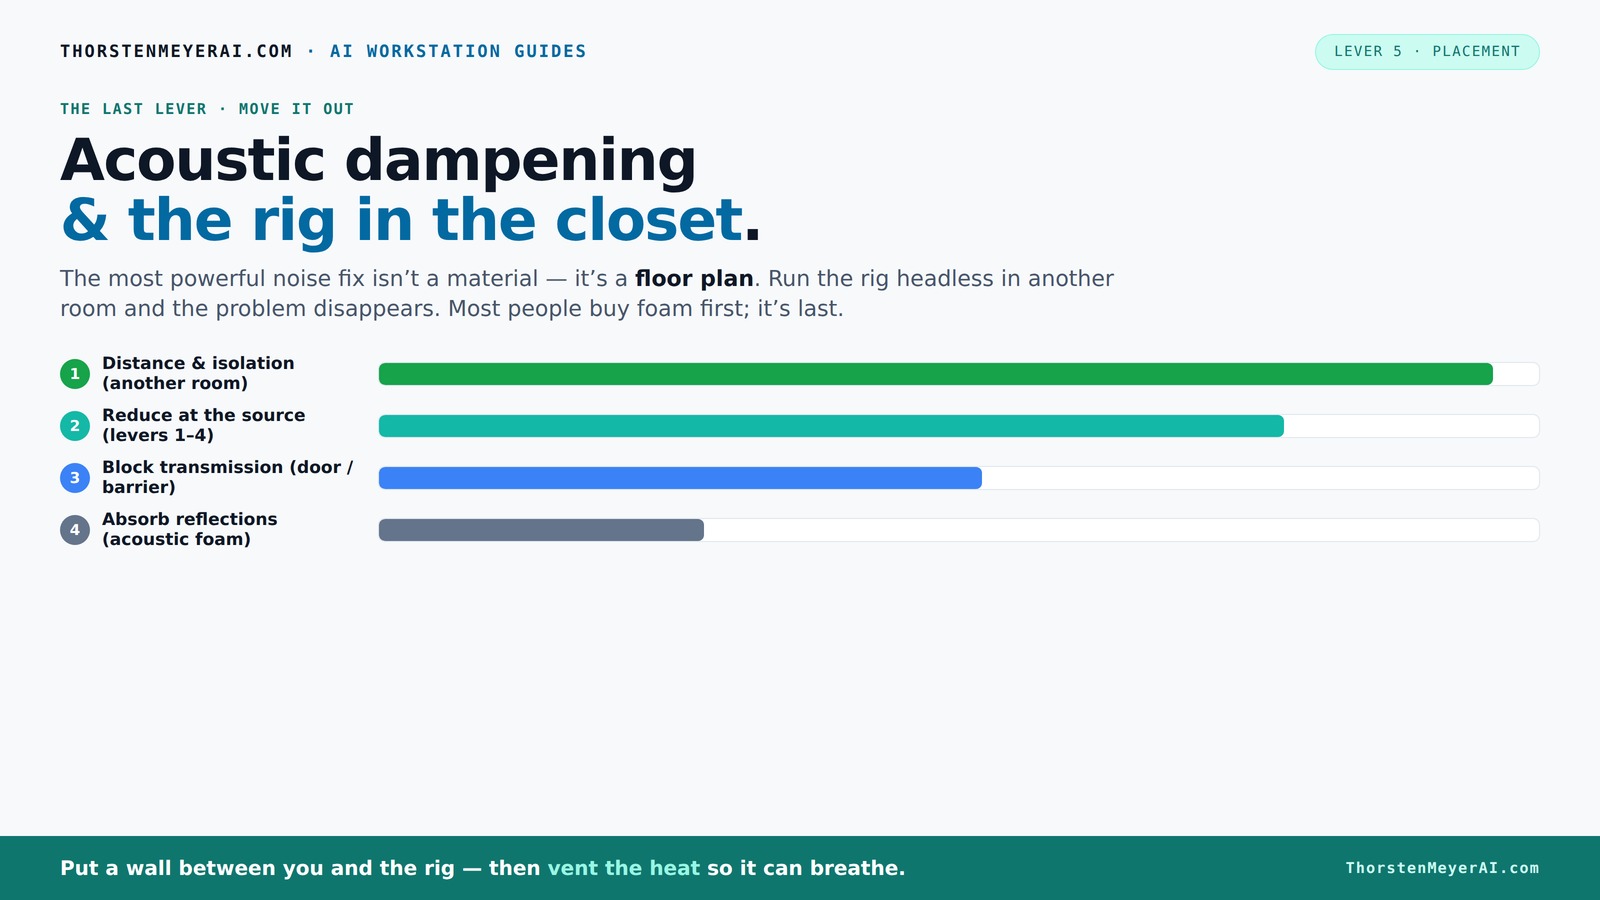
Acoustic dampening
& the rig in the closet.
The most powerful noise fix isn’t a material — it’s a floor plan. A rig you can’t hear because it’s in another room beats any amount of foam. Tap the approaches in Part 1 to see what actually works.
(another room)
(levers 1–4)
(door / barrier)
(acoustic foam)
Contain the noise, not the heat
Key Takeaways
- Position your mic carefully—avoid facing reflective surfaces and treat reflection points for cleaner recordings.
- Sealing the door and adding ventilation are essential; don’t just rely on foam or blankets alone.
- Use soft materials like blankets, foam panels, and rugs to absorb reflections and reduce echo in tiny spaces.
- Treat the corners with bass traps only if you notice low-end buildup or muddy sound.
- A closet can be a quiet, effective vocal booth when you balance acoustic treatment with heat management.

MUSICUS B-Free 2.0 Modular Vocal Booth for Recording, Portable Sound Isolation Booth for Home Studio, Voice Over & Podcast, 4-Layer Acoustic Panels, Built-in Ventilation (Medium, Black)
- Sound Reduction: Up to 26 dB noise reduction
- Acoustic Absorption: NRC 0.89 for sound control
- Third-Party Tested: KCL certification available
As an affiliate, we earn on qualifying purchases.
As an affiliate, we earn on qualifying purchases.
What a closet booth is good for (and what it isn’t)
A closet can be a surprisingly effective space for recording vocals, podcasts, or voice-overs. Its small size naturally reduces room reflections, giving your recordings a more direct sound. But it’s not a magic bullet. Without proper treatment, it can also turn into a box with booming lows and muffled highs.
Imagine recording a voice in a tiny, untreated closet. You’ll notice a lot of echo, especially if the walls are hard and reflective. Add some blankets and foam, and suddenly your voice sounds much cleaner. The key is controlling the reflections, not just absorbing sound with foam — which won’t eliminate all noise or echoes by itself.
Why does this matter? Because reflections and echoes distort your voice, making it sound distant or muddy. Properly managing these reflections ensures your voice remains clear, focused, and professional-sounding. The tradeoff is that too much absorption can make your recordings sound dead or unnatural, so balance is key.
Acoustic dampening vs. soundproofing: what’s the real difference?
Acoustic dampening is about reducing echoes and reflections inside the space. It makes your voice sound clearer by absorbing the sound waves bouncing around. Soundproofing, on the other hand, stops sound from leaking out or coming in. It’s about blocking noise transmission through walls and doors.
Understanding this distinction is crucial because it influences your approach. Dampening can be achieved with affordable materials like foam panels or blankets, which target internal reflections. Soundproofing, however, involves adding mass and sealing gaps—solutions that are more complex and costly. The tradeoff? Dampening improves your recording quality without the hassle of full soundproofing, which can be unnecessary unless you're trying to block out loud external noises or prevent your voice from bothering neighbors.
For most home setups, focusing on dampening and sealing the door provides a practical balance—improving clarity while keeping costs and effort manageable. Overemphasizing soundproofing can lead to diminishing returns, especially in small spaces where controlling internal reflections has a bigger impact on sound quality than complete isolation.
Where to place your mic and how to treat the walls for the best sound
Placement comes first. Position your mic so it’s not directly facing reflective surfaces. The goal? Capture your voice directly and minimize early reflections. For more tips, see our guide on acoustic treatment placement. Typically, placing the mic 6-12 inches away from your mouth and slightly off-center helps avoid picking up sound bouncing off the walls.
Focus treatment on the wall behind and in front of the mic. Use foam panels, blankets, or DIY acoustic panels to absorb sound waves. Overhead treatment is often overlooked but crucial in small spaces — hang a blanket or foam overhead to cut down on ceiling reflections.
Why does this matter? Because reflections from surfaces close to your mic can cause comb filtering and muddiness, degrading clarity. By positioning the mic carefully and treating reflection points, you ensure your voice remains crisp and natural. Bass buildup in corners can cause boomy lows, which is why adding bass traps in upper corners can help balance the sound. The tradeoff is that improper placement or treatment can introduce new issues like phase problems or dead-sounding recordings, so experimentation and listening are key.
Handling walls, ceiling, floor, and door — smart fixes for a tiny space
Walls and ceiling should be covered with soft materials—blankets, foam, or panels—placed at reflection points. You might find it helpful to read about acoustic dampening techniques for small spaces. Use a mirror trick: sit facing your closet mirror or a reflective surface, and mark where sound bounces back to your mic. These are your reflection points. Properly treating these spots prevents sound from bouncing directly into your mic, which can cause comb filtering and muddiness.
For the floor, a thick rug or carpet helps absorb sound and prevent bouncing, especially in small spaces where sound waves can reflect multiple times. Treating the door is critical because it’s often a major leakage point. Weatherstripping, acoustic sealant, or hanging a thick curtain or moving blanket over it can block sound leaks. For more advice, see door sealing and acoustic treatment. Seal gaps around the frame too, as tiny leaks can undermine your entire setup.
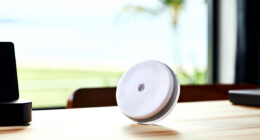
Ventilation is often the biggest overlooked element. A sealed closet traps heat, which can damage your gear or cause discomfort. Adding a small, quiet fan or ducted airflow system maintains airflow without sacrificing sound isolation. The tradeoff here is balancing ventilation with noise leakage—quiet solutions are essential to avoid introducing new background noise.
Common mistakes that ruin your closet’s sound quality
One mistake? Over-treating with foam in every corner, which can make your voice sound dull or boxy. Instead, focus treatment on reflection points, not the whole space. Over-absorbing can deaden your voice, removing natural warmth and making it sound unnatural. It’s a balancing act—too much absorption reduces liveliness, while too little leaves echoes. Learn more about balancing acoustic treatment for optimal sound.
Another is sealing the door too tightly without ventilation. Your gear will overheat quickly, and you’ll end up fighting throttling or shutdowns. Proper ventilation is essential to prevent equipment failure and maintain comfort.
And don’t forget: placing the mic too close to reflective surfaces or in a corner can boost low-end booms and muddy your recordings. Positioning and treatment go hand in hand. Check out mic placement tips for better recordings. The tradeoff here is that poor placement or excessive treatment can compromise clarity or cause phase issues, so always listen critically and adjust accordingly.
Budget DIY materials for turning your closet into a pro-sounding booth
Think simple: blankets, pillows, and moving quilts are your friends. Use heavy blankets to cover walls and doors, but be mindful that too many thick layers can make your recordings sound muffled or deaden natural tone. Foam panels, available cheaply online, can be mounted with command strips or thumbtacks, but placement matters—aim for reflection points for maximum effect. Carpets or thick rugs on the floor help absorb bouncing sound, especially in small spaces where sound waves reflect multiple times.
For a quick fix, hang a quilt behind your mic and drape blankets around your head for voice isolation. DIY bass traps can be made from mineral wool or even old mattresses placed in the upper corners of the closet. These traps help tame low-frequency buildup, which can otherwise cause muddy, boomy recordings. The tradeoff is that DIY solutions may not be as precise or durable as commercial products, but with proper placement, they can significantly improve sound clarity on a budget.
Want to get fancy? Combine DIY materials with a commercial acoustic foam kit. It’s a cost-effective way to improve sound without breaking the bank, and it allows you to customize your setup for better results.
FAQs: Your top questions about closet booths answered
- Can a closet really work as a vocal booth? Absolutely. With proper treatment and placement, a closet can reduce reflections and echo, giving you a clean, professional sound. It’s about understanding how internal reflections impact clarity and using strategic placement and absorption to control them.
- What’s the difference between dampening and soundproofing? Dampening reduces reflections and echo within the room, while soundproofing blocks sound from escaping or entering. Recognizing this helps you prioritize your efforts based on your goals—whether improving clarity or isolating noise.
- Where should I place acoustic foam or blankets for the best results? Focus on reflection points—behind and around your mic, ceiling overhead, and corners if low frequencies build up. Proper placement ensures sound waves are absorbed before bouncing into your mic, leading to clearer recordings.
- Do I need bass traps in a closet setup? If you notice boomy lows or uneven bass response, adding bass traps in upper corners helps balance the sound. They prevent low-frequency buildup that can muddy your recordings and make them less natural.
- How do I treat the door so sound doesn’t leak? Use weatherstripping, acoustic sealant, or hang a heavy blanket or moving quilt to seal gaps and block leaks. Proper sealing reduces sound leakage, ensuring your recordings stay contained and quiet outside the booth.
Conclusion
Your closet isn’t just a storage space. With thoughtful placement, strategic treatment, and proper ventilation, it can become your secret weapon for clear, professional-sounding recordings. The trick? Focus on reducing reflections and managing heat — not just slapping foam everywhere.
Imagine a small space filled with soft blankets and a well-placed mic, capturing your voice with clarity and warmth. That’s the power of smart DIY acoustic work. So next time you think about noise and echo, remember: the best booth might just be a closet with a little love and attention.